Making Halloween Crafts on a Budget
I have a daughter in her early teaching years and I seem to find myself always looking for things she can make with her students on a budget. Here’s my adventure.
My plan this Halloween season was to find different ways to make ghosts. Pinterest is still new and scary for me, but after a little research, there are a few ghosts I think would go over well. They all look so easy when you see the finished project online but I already had my doubts as I began.
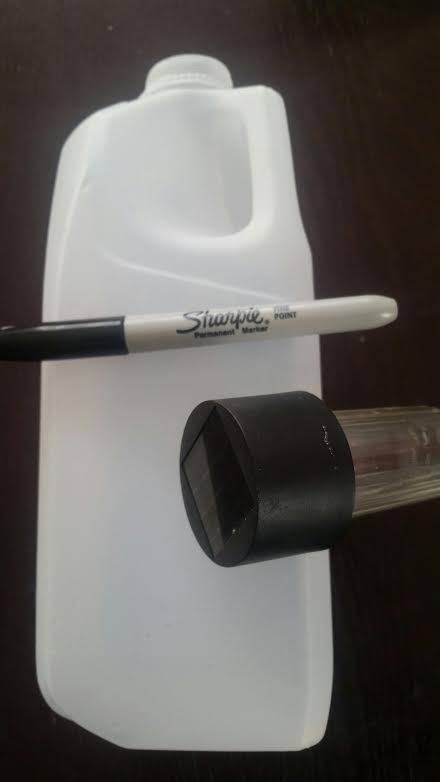 The first ghost I made was out of a milk jug. Sounded easy enough. Following the instructions online, I needed to line up two milk jugs, a black permanent marker and a battery powered candle or a glow stick. I put my own twist on it by grabbing a solar light from my garden.
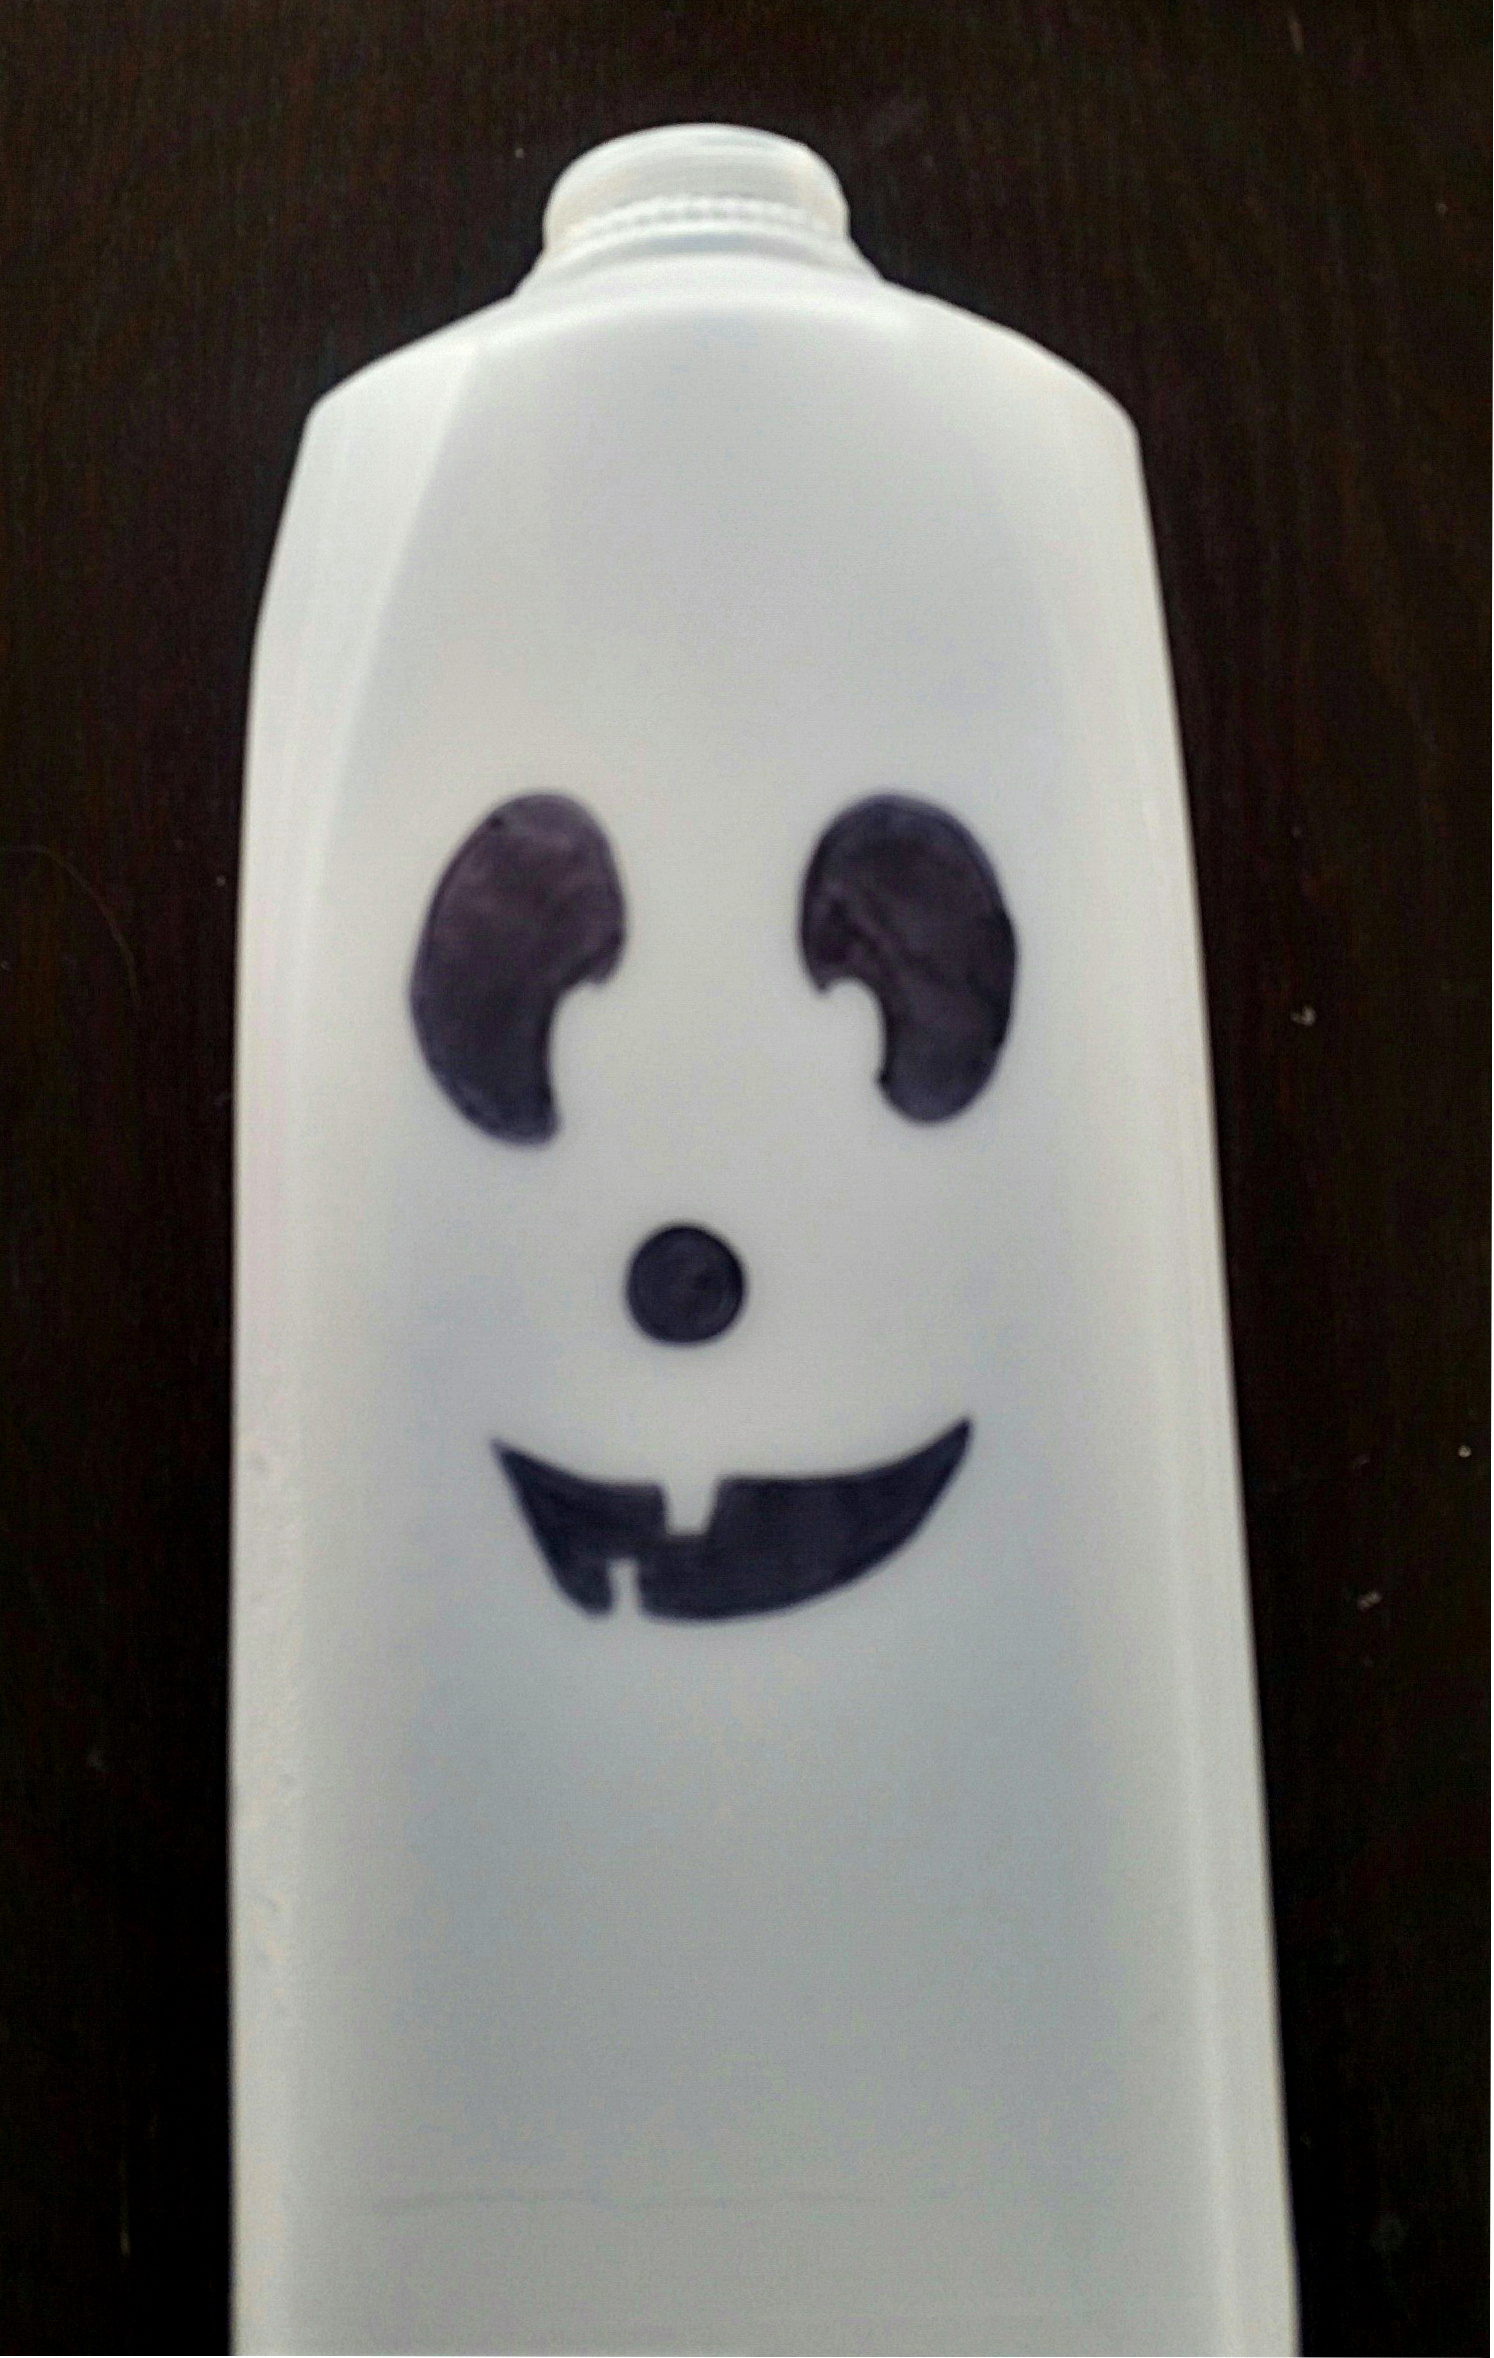 After making sure the milk jugs were clean, I marked out two faces, one on each jug. So far, so good. Next, I added the solar lights to the top of the jugs, with one good push the light fits snugly into place. Project one complete, I had such pride in myself and it was a craft any first grader could pull off.
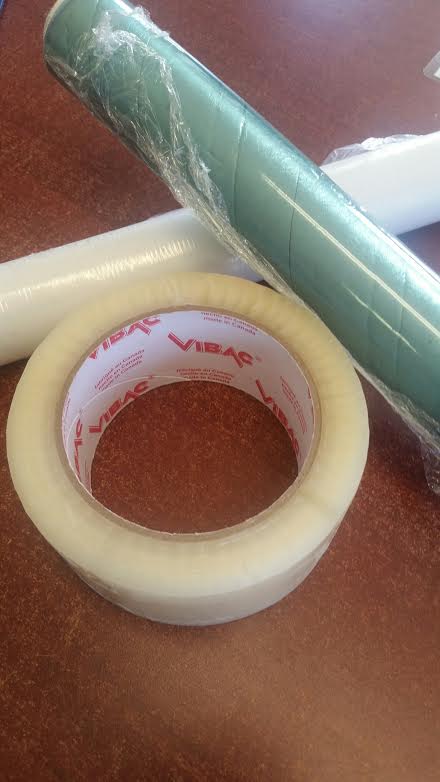 My second ghost was a packing tape woman. As I work at a Self-Storage facility I had access to plenty of packing tape so that part was easy and turned out to be the only easy part of this project. The next step in making my ghostly lady was to find a volunteer to stand there and let me wrap her up. I had no clue how long this was going to take. My lucky volunteer is a petite woman so I thought this would make things go a little faster. Online it is suggested you use Saran Wrap first, I would have thought that to be an obvious thing but glad they are putting that hint in there. I wrapped my lady from shoulder to knees in cheap Saran Wrap. A suggestion online is to wrap two times to give some strength to the figure.
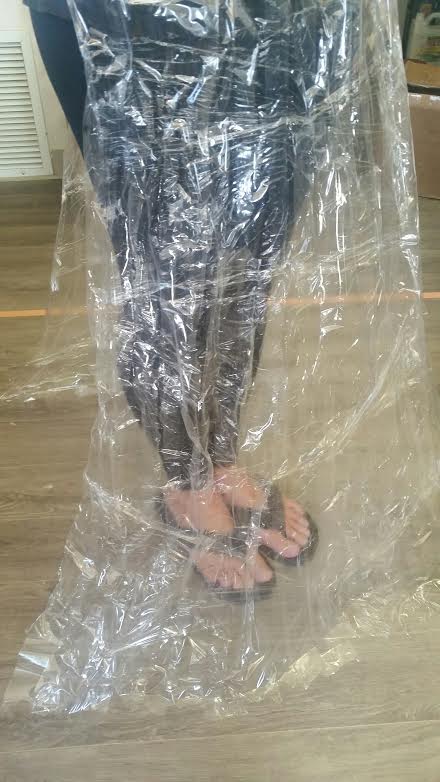 To break it down a little, I first made a belt around her waist and used this as the anchor for the skirt. To build in some shape to the bottom half I taped the lines right to the floor. Doing it this way I was able to give the dress a look of movement, at the same time as giving my volunteer lack of movement. Hint, pick a very accommodating volunteer!
 Getting the dress wrapped into shape took just under 3 hours from start to finish. I had water and snacks on hand for my lovely lady, and it turned out to be needed.
Next step was to cut her out of this packing tape dress without ruining it. Something I did not think of and was not made aware of, by the time you have wrapped this dress once in saran wrap and then twice in tape, it is getting tighter than you would think. I had only regular scissors on hand, but after having done this project I would suggest the small blunt tipped ones just to be safe. I cut from the shoulder area to the wrists and then right down the back from the base of the neck.
 My volunteer was able to step out of the form at this point. It nearly stood on its own! Together we taped the arms back into shape and same with the back. Next step is to remove the figure from the floor. I cut just above the floor base and then peeled off the end pieces left behind.
In all honesty this article had the head done the same way but I didn’t feel comfortable wrapping my volunteer to that extreme and I wonder if it would hurt the outcome. Once the figure was free standing I taped over the opening in the neck and made it a simple body form.
 At this point I was giddy with pride at the finished project. The only thing left was to get lights to put into the body for nighttime. Before I did that I hung the form from a planter hanger outside and it seemed to float there just as I had hoped it would.
Awesome ghost, but it is too complex and time consuming for children.
 My third ghost is made from cheese cloth and corn starch. Online they are very cute in appearance, so I hoped for the same results. This project requires cheese cloth (which you can find at nearly any grocery store), corn starch, a round object to use as your form, a little bit of black felt for eyes, and warm water in a bowl. For my form I used an unwrapped Styrofoam ball standing on a glass. Placing it on a glass lets you adjust the height of your ghost. First step was to measure out the length of your ghost by unfolding the cheese cloth and keeping in mind that you need twice the length of your ghost so you can add a second layer.
 Second step was to add equal parts of water and corn starch and make it thicker. I did it in the microwave as suggested and it worked but was too hot to put my hands in. I had to add cold water in order to get my hands in safely. I covered the first piece of cloth in the mixture and wiped off the excess starch. You need to unfold the cheese cloth and lay it flat over your form. I checked the length first and the ends laid nicely at the bottom to give it a pool of cloth, looking like a frill. Second layer is done the same way and then it has to sit and dry before you can do anything with it. The instructions say to let sit 12 to 24 hours.
 Twelve hours later and the top half was dry but not the bottom so I would suggest you plan on 24 hours. At the 24 hour point I removed the cheese cloth from the form. I would use a balloon next time as it was hard to get the ball out in one piece.
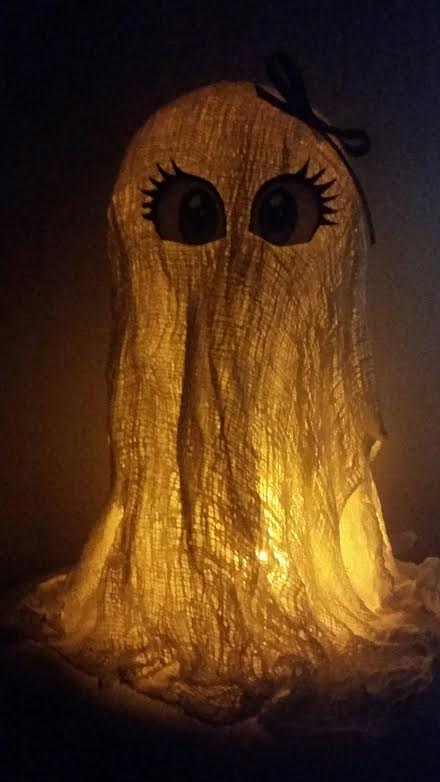 My third ghost stood on its own, I added eyes and a red ribbon bow to make it, a she. I used half of the cloth in the package, so I also made a smaller version of my lady ghost. This project was fun and fairly easy to do. I could see it as a school craft as long as there was some adult guidance.
I really enjoyed doing all three of these projects and now can proudly display all of them in the office over the Halloween weekend.
-Sue Sage


")